Screen recording is becoming easier and easier

Ever think about making a quick introductory video to help get students hooked on a new topic at the beginning of a unit?

How about having students explain their reasoning by creating quick videos to help teach a concept to their peers? 

Or maybe you just want to record a small part of a lesson. 

Google Chrome (Internet browser) has many hidden add-ons you can install on your own; called Extensions

Screencastify, a Chrome Extension, adds the ability for anyone to create screen recordings with no additional software. Screencastify will save a video directly to Google Drive for you to keep privately for yourself, share with one or two people, or to publish on the web for everyone!

**Add the Screencastify extension to your Google Chrome by following this link:  https://chrome.google.com/webstore/detail/screencastify-screen-vide/mmeijimgabbpbgpdklnllpncmdofkcpn?hl=en   **

For those you like to read directions about recording, find those here: https://www.screencastify.com/ 

Want help with any of this, want to talk more about how you can leverage technology for learning, or have a project idea and want help making the technology do what you want it to do? Just let me know. 

Also, follow our Twitter feed, authored by Tony VonBank, for Princeton classroom highlights and the occasional intriguing article @innovation477


Google Classroom

So far this year, Eric, the tech coaches, and I have been doing our best to make great strategies and integrated resources available so teachers can teach more effectively and efficiently. One tool, however, has taken us a bit by surprise, mostly because we haven't really pushed it or recommended it at all, it just sort of caught fire on its own...

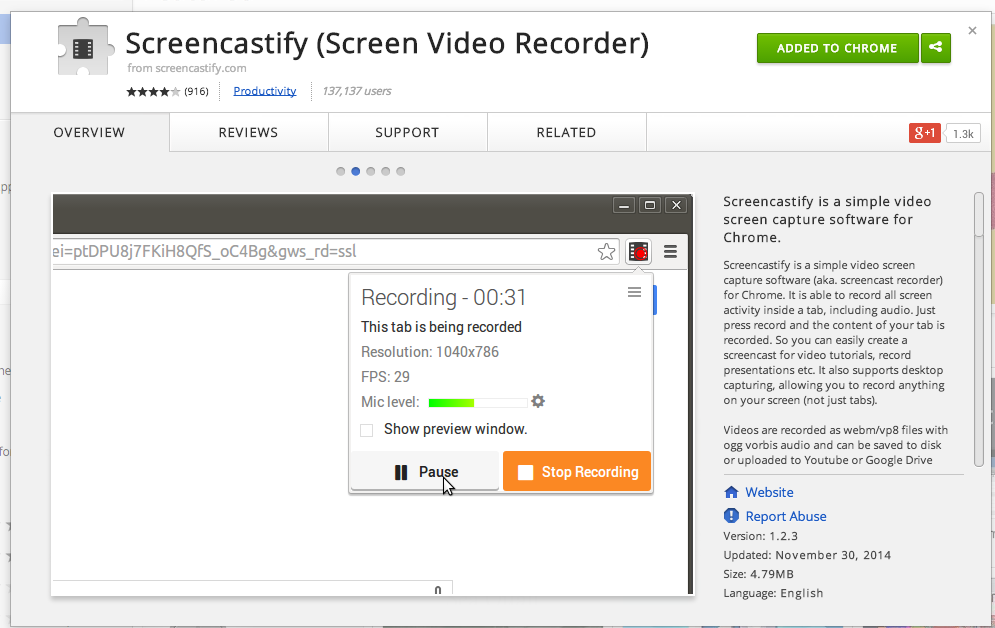
If you haven't heard of Google Classroom, here is a quick run-down: Classroom is accessible through your Google Apps for Education account in the same way Drive, Calendar, Mail, and Sites are. It is under the cluster of nine dots on the top of most Google pages.

Google Classroom is somewhat like a Learning Management System, such as Moodle, Edmodo, or Schoology. What makes Classroom unique is that it is built in to the tools you already use. In truth, it is more of a companion to Google Drive than anything, but it works really well for managing online and digital classwork and the related communication that goes with digital work. Is it as powerful as Moodle or Schoology? No, not quite. However, once you figure in the very easy learning curve and the fact that students don't really need to learn anything new to use it, it kind of sells itself.

Entry level: Beginning teachers can easily and efficiently use this tool to make a daily record of what was done in class. This benefits students who miss class and those who will need another look at materials used in class. Add documents from your drive, slideshows or YouTube videos with one click. The basic structure of the flipped classroom is available here, allowing for video lessons to be easily posted from day to day.

Digital lessons: Classroom can also be used to use digitally rich lessons and projects in a way that is easy to collect, evaluate, and respond to. Using the assignment posting, teachers can post directions to a learning task, and attach everything the student might need to produce great 21st Century work: rubrics, examples, related content, video instructions or inspirations, and any pre-made forms that will be needed to be completed by the student.

Making a copy: When teachers use Google Drive with students, they often ask students to share an assignment with them, perhaps even asking them to take a pre-made document, make themselves a copy change the settings, and share it back to the teacher. The teacher then collects the documents that are shared back into a folder. Google Classroom eliminates the need to do any of this. When a teacher wants students to turn something in as an assignment, the incoming work is automatically tagged by name, date, and assignment, and neatly added to a folder marked with the name of the assignment. Pre-made documents the teacher creates and shares with the class are automatically copied for each student, eliminating the need for the student to do anything but submit.

Paperless classroom? Ok, this may be a stretch if the students do not have a device every day, but you can get pretty close. Host discussions in Google Drive or though a third-party app like todaysmeet.com, host student blogs, create online quizzes and tests with Google Forms, flip lessons, and get everything typed and organized. Communication is simple since all students will have access to Gmail at the same time they use Classroom. It's a great all-in-one solution.

Check it out or let me know and I can stop by for a walkthough. The HS Science and Social Studies departments are already using it pretty well, so if you want a closer look, check with any of them as well!


Mr. Gillespie's Office: What Students Want From Their Teachers

Mr. Gillespie's Office: What Students Want From Their Teachers:


"I want the subject to connect to my life.

I like the classes where we (students and teachers) are equals and share the responsibility for learning.
Allow us to participate in the learning.
Make the class fun. Allow us to move around and be active.
I like the classes where we play games that help us learn.
Let us use technology."

Read the whole post. Very powerful stuff!

Student-lead news broadcasts at North Elementary

These three 5th graders are part of a team that broadcasts live news every day through Google+ Hangouts On Air to their 3-5 elementary school building. Classrooms can tune in live, or visit the recorded news broadcasts later in the day when the schedule requires. All broadcasts are on-the-fly. They don't edit and video, simply cover what is happening around their school and community.   

Armed with a Chromebook, webcam and tripod, they also cover live events like the MN Department of Education Commissioner's visit to North Elementary in Princeton, Minnesota, today. 

They occassionally have a Roving Reporter, live interviews held outside of the studio (but within range of the school's wifi) from an iPad, join in on the Hangout broadcast. 

View the student-lead coverage of Commissioner, Dr. Cassellius' visit to North Elementary: https://www.youtube.com/watch?v=oFLpB5FgRqA

Initial survey results

Thanks to everyone who gave feedback on the What I Need survey. The results will help us customize our support, and helps us know where people are in their evolution as a digital-age teacher.

Some highlights:

Many people indicated a need for more / better / different devices for students to use. We will be taking a closer look at what specific device needs are desired.

Many people still looking for training on Google Apps for Education. More training on these is imminent.

Many people desire more work time and planning time to work on integration. This will certainly be a point of discussion as future staff times are scheduled and planned.

More to come! stay tuned!

Promote and model digital citizenship and responsibility

The ISTE NETS go beyond what you can do with a device to what you should do with a device.  This stance supports one of the most basic tenets of teaching with technology; that all teachers are responsible for teaching digital citizenship and responsibility. Too often we look to the computer applications or media center teachers to carry this load, but that is a dangerous path.


Unless all educators are knowledgeable in basic digital ethics and responsible use, and are committed to embedding these constantly in their digital instruction, we leave a lot of the most dangerous consequences to chance. We tend to think that as the digital natives, students understand the reach of social media, realize that digital photos are forever, and are clear on why plagiarism is unethical and illegal. We need to remember that they are still children, and they are still learning.  While we think it great practice for a child to be reminded 300 times by 30 adults over 10 years that talking to strangers in real life is dangerous, we sadly often leave the same admonition about meeting people online to a few chance mentions by a few adults spread out over a few years. It takes a village.

Model digital age work and learning

The third of the ISTE standards for teaching is perhaps the most difficult and the most important. By modeling digital age behavior, we help students to learn not just the nuts & bolts of how things work, but the appropriate, ethical use of digital age tools as well.  


What makes this difficult is that this is a knowledge set most teachers need to learn. That adds additional pressure to know more and more; not just the content area, best instructional practices, and school expectations, but another realm as well. In reality, however, not staying current on these issues is detrimental both to the teacher's employability and to the students in their care.

For most teachers, administrators, and other school educators, modeling digital age work is difficult NOT to do at least from time to time. Meetings are flipped or enhanced with technology, administrative tasks are increasingly paperless, and online collaboration continues to thrive. The big change comes when teachers see that the grade portal or class site they use as a matter of fact is a big part of this aptitude, and simply building off of the communication skills used when cultivating that portal connection can be expanded to many other tasks without much additional work.

On the whole, the idea is to work smarter, not harder. Technology is meant to allow us to be more effective and more efficient. Deliberate integration and modeling of digital skills will pay efficiency benefits over time.

Designing and developing digital age learning experiences

In the effort to continue to look at the ISTE standards for technology integration, the focus of this writing is on design and development. The standard for teachers outlines how lessons should not only become digital, but become relevant to individual learners. Much like the SAMR model, these standards ask teacher not simply to replace a traditional learning task with a digital equivalent, but to create a learning experience beyond what is possible with traditional methods. The power of this standard is in the relevance to the student. Individualized, collaborative, and project-based, these learning experiences are rich with meaning and highly engaging.


Working with tech coaches and the technology integrationist, teachers can stretch their lessons further without losing the ability to personally connect with students or lose the rigor of the lesson. Done well, designing digitally enhanced lessons will enrich the rigor and relevance to students, often with little or no extra work on the part of the teacher. We simply change the work we are doing to help students better understand the learning targets of the lesson. There are many resources to help in this effort. Too often, teachers only call on the technology department when things go wrong. Ideally, the technology department is working side-by-side with teacher to develop quality digital-age instruction, and assisting in the execution of these lessons. We welcome the opportunity to assist teachers and students in meeting their integration goals!

Tenth grade social studies: Using Google docs to make integrated proposal

The assignment for Mr. Eversman's class was simple: make a case for why a certain place would make a good spot for an English settlement in the colonies, circa 1620 or so.

Student objectives were:

  1. Apply knowledge of colonial settlements to the new project
  2. Navigate a map to determine topographical advantages
  3. Research native peoples and trade economies

The project is written up as a scenario. The king of a foreign land has gained permission from England to build a settlement in one of the 13 colonies.  They will pose as a research team, presenting a proposal to the king as to which location would be the best choice.

They are to consider:

  • Climate of the area
  • Local native tribes 
  • Trade economy
  • Agriculture, fishing, and hunting opportunities
  • Access to both fresh water and an ocean passage
  • Natural resources

Jamestown, circa 1609

To put this all together, they used Google Maps or Google Earth to find places they found suitable. There was a lot of discussion and debate in the teams as to which places would make great spots. Once they had an idea, one group member worked with the map, and the other(s) worked on researching the other considerations.

Everything is written up on a shared Google document. One person in each group opens one document, and then shares it with the others in the group as well as Mr. Eversman. From there, multiple editors are able to work on the different components.

For the map, students used the screenshot feature (command+shift+4) to get a snapshot of the area of their settlement from the Google Map, and then dragged that photo from the desktop straight on their document, all the while another partner was writing the descriptive paragraph to accompany it. Some students used the Insert->Draw feature of their docs to bring the picture in, and then add arrows and words to mark parts of the area they chose.


As the work progresses, they will be make a complete sketch of the town they are building. Some use different online tools to do this digitally. Others do a paper and colored pencil sketch. Either way, the image is also added to the document.

The resulting project will be a combination of artistic representation, maps, and several written segments, all written and created by multiple editors.


At grading time, Mr. Eversman is able to open each of the projects from his computer or iPad, and leave comments connected to the rubric criteria. Students may improve the project based on this feedback.  He can then, at his leisure, add them to a shared folder and allow each student to take a look at the work their peers have done, or they could be published on a blog to share with the world!


How can I transform my lessons with Google Apps for Education?


One thing I think is often missing in the conversation about tools such as Google Apps is how to actually use them in day-to-day teaching. Knowing what a tool can do in the abstract is far different than seeing the actual concrete example of how it fits into the classroom curriculum. 


Here is a quick snapshot of examples of applying Google Apps in a real classroom:

Docs:

  • Lab notebook shared by lab team
  • Collected poems, stories, recipes, or drawings
  • Reflection or creative writing journal, shared with teacher
  • Peer critique, revision, or editing of written work
  • Collaborative planning (with projector)
  • Students write practice questions, problems for each other
  • Make links of materials used in class to post online (students who are absent, need another copy)


Spreadsheets:

  • Collect data during research or labs from multiple people
  • Organize topics, jobs, or differentiated tasks
  • Create rubrics
  • Collect sources from internet research
  • Organize what students have checked out
  • Dividing tasks for a project or for the classroom


Presentations:

  • Make PowerPoints mobile by turning them into a web link
  • Make a collection of videos relevant in class, with additional information
  • Make a slideshow of pictures and post on a site
  • Embed slides on site so students can quickly review information
  • Replace poster projects with a slideshow
  • Use in concert with a voice-over to produce video instructions
  • Replace written book reviews with pictures-only presentations to accompany a talk
  • Assign each student a portion of the whole, and have them all make slide(s) on same presentation, then assign for students to use for review or further discussion


Forms:

  • Collect information from students easily and quickly
  • Project peer evaluations
  • Quick formative assessments
  • Interest surveys
  • Collection of data, sources, or other info you collect over and over
  • Parent info
  • Voting for student council, class leaders, etc
  • Checking in or out materials, books, etc. 
  • Bathroom/locker check in/out
  • Book reviews that can be shared with other kids (like Amazon customer reviews)


Calendar:

  • Share classroom calendar with parents and students
  • Share calendars with others in your team, group, or department
  • Assignment calendar for students
  • Embed on site for others to see
  • Students can create one to build timelines for history
  • Digital datebook


Sites:

  • Share daily or weekly information with students or parents
  • Flipped classroom videos
  • Have students use to show learning on a subject (groups or individual)
  • Centralize information for your department, team, or group
  • Collect digital materials for class
  • Have students create a portfolio to showcase their learning
Drive in general:
Make a digital version of anything and post online for students who have missed class or need review. Especially helpful when large groups of students are gone for activities. Interconnect almost anything you create with anything else. Connect docs with calendar, embed slideshows in docs, add spreadsheets in presentations, add a form to a doc or email. Limitless. And that is just the beginning. Add more tools to build a web of easy, engaging, relevant work with students.


Any of these can be learned in a short amount of time. Please let Tony know if you have a project or lesson that would benefit from the implementation of any of these and he can assist.


Why Google Apps? Why not Word, Powerpoint?

As we are a Google school, it is important to understand just why using Google tools is a good thing, and why we will eventually move away from using Microsoft products like Word and Powerpoint.

There are three main reasons why Google Apps for Education are the best choice for most education tasks:

1. Mobility. Since the application and the product are both online, any document can be worked on or viewed from any device with an internet connection. This means that work that is not completed in the lab setting can be finished at home, projects begun at home can be finished in the media center, and people can move from computer to computer and back again without loss of information. Another key part of this is the auto-save feature on most Google Apps, such as Docs. With an open internet connection, what is input is automatically saved every few second or so, which means that there is far less chance of losing unsaved work in the event of a computer glitch, power outage, or forgetting to save. There is no need for auto-recovery. Just need to get logged in again, and all set!

2. Collaboration. The greatest power in Google applications is that more than one person can edit a documents, spreadsheet, or presentation at once, in real time if desired. Students can easily collaborate on written projects, or make a presentation with several people making slides at once. Just about everything can be shared with multiple users. Teachers can co-own a document with a student, and assist them without transfer of file or paper. The revision history feature allows for anyone to see a color-coded record of changes that were made by different people, allowing teachers to see who has contributed and what they have contributed.

3. Cost. The entirely of the Google Apps for Education suite is free for educators. That comes with generous cloud storage and a host of interconnected applications that work together well. Because of this, a majority of public school districts and post-secondary institutions have adopted this set of tools for their staff and students. In addition, access for students is more equitable. Since there is no paid application, students need not have a powerful computer or current applications at home, just an internet browser.

As we continue to support these tools in our district, we will continue to see the benefits of more and more people collaborating with these tools. The best result is when teachers can integrate the use of these tools in their instruction to offer rich, collaborative learning experiences for their students.

For more info, please see the following video:


Do I need an LMS? If so, which one?

Even though you may have never heard the term LMS before, you already know what they are! LMS stands for Learning Management System. If you have ever worked with, or even seen, Edmodo, Moodle, Schoology, Blackboard or D2L, you know what a LMS is. LMS help teachers to manage the business of teaching in a more efficient way. While each LMS offers slightly different functions, some of the key elements of all LMS are:

  • Ability for students to post assignments online for teacher review
  • Ability to take auto- or manually-graded tests and quizzes online
  • Grade collection, sometimes exportable to a parent portal like Skyward or Infinite Campus
  • Online discussion areas
  • Ability for teachers to post assignments, files, and links for student use
  • Mobile access
In Princeton we have some teachers using Edmodo, particularly at the middle school, and probably have a couple of people using Schoology. I am not aware of anyone using other LMS, some of which require a paid subscription.

Should I be using a LMS? Maybe. A few things to consider:

1. LMS are geared toward direct student interaction, which means that they are less and less effective the younger the student. While Edmodo boasts efficient usership even at the early primary grades, LMS generally do not become truly relevant until students are in 3rd grade or older. In our case, that would mean that LMS would be somewhat impractical at South, but could be looked at for North students and above.

2. Some LMS are more functional for different grade levels. Edmodo os matched very well for middle grade students. Its Facebook-style interface is easy for students to navigate, yet the program is really powerful and allows students to stretch learning beyond the classroom easily. Conversely, an argument could be made that Schoology is better suited for high school. 

3. If you have high school students, they will have to use a LMS in just about any post-secondary schooling, whether that is tech school, community college, or university. MNSCU, the state college consortium in Minnesota, uses D2L, which is very similar to Moodle or Schoology. These students should get exposure to uploading digital assignments and online directed discussions before graduation.

4. For some, the classroom website meets all of the same needs as the LMS, reducing or eliminating the need to have one at all. Depending on how you use your site to connect with students, you may have created your own personal LMS application!

5. For the student, it can get very challenging to manage different systems with each of their teachers. Some consistency within teams, grade levels, or even buildings is a benefit for the student.

An additional consideration is the new Google Classroom application. It has only been released widely to teachers and students for a short time, yet in a Google district (as we are), it would seamlessly interact with our drive, docs, presentations, and calendars. We have at least one teacher piloting it this week (Sue Vanhooser), and I intend to watch closely her success and challenges with this system. The feedback we get on this pilot will help us determine the best way to proceed in getting teachers the tool they need to be more effective. Good Luck Sue!


Welcome to the 21st Century!

The term 21st century learning has been bandied about since before the century began, and yet we
still continue to use it, now a considerable stretch into the 21st century.  The reason this term has endured for some 20 years is that despite many advances, we are only now seeing education begin to catch up to the technology of the time.

Many of our educational practices better resemble 20th century schooling. Some even hark back to the 19th century.

The challenge of 21st century teaching and learning is to help instructional methods and the experience of learning in public schools to evolve and stay relevant in a world where the whole of human knowledge is available to every kid with a smartphone.

In order to do this, The International Society of Technology in Education (ISTE), the largest consortium of progressive educators has worked with teachers and students all over the world to outline key aptitudes needed in schools today. The first component is featured below:


These standards are becoming more and more crucial for student development, and yet they are very commonsense and reasonable. They mirror state and national standards for content and curriculum, while adding the key dimensions that make living in today's (and tomorrow's) world successful. Consider the impact these make on learning in a classroom, and continue to consider the 21st century learner in the honorable and challenging work that is done is the classroom!

Maps Engine: Interactively meeting benchmarks: From Two Moons, Africa, and Civil War Battles

Google Maps Engine Lite can help you create advanced custom maps to share with collaborators and also publish to the web.  Students can build many different digital contents into each map point such as photos, YouTube videos and student writing. Click here to read Eric's observation of students working on a project in Mr. Clifton's classroom.


Maps Engine Lite vidcast showing student examples and literature tour, Two Moons idea.   


Maps Engine Lite Tutorial, including importing of Civil War Battles   

    Africa unit project - interactive map building


    I visited Mr. Clifton's 8th grade geography class for the end of 3rd hour and the beginning of 4th today. They are beginning their final assessment for their Africa unit. Mr. Clifton was willing to do something different with the unit project and offered to develop and new project starting with the rubric from his previous project for this unit. 


    Students are to create a dream Africa trip, stopping in at least 10 places during the trip. Me. Clifton wanted students to be able to add multimedia and written responses for each of the 10 locations. Google Map Engine came across as a great way for students to create the maps, as his students have access to a chromebook cart for checkout. It's basically a Google map that you can collaborate and build many different digital contents into each map point such as photos, YouTube videos and student writing. Students did not have any hesitations getting started with the online map tool. 

    Students were logged into Chromebooks during the initial explanation of the project, as Mr. Clifton linked the rubric and planning Google doc to his webpage - not to say that this project couldn't be done if you don't have a webpage! 

    I am excited to see some of the maps as students get more into building some of the content!


    30 second tip to share with staff:
    Reopen closed tab on chrome.

    Fear Factor, and Math with a POW

    FEAR FACTOR


    The culture of learning is being transformed by technology. How students take in information is very different in today's society than it was even five years ago, with easily accessed images, video, world information, blogs from leaders in industry, and social media, to name a few. How we, as educators, embrace that new culture and adapt our lessons to use technology tools can often create anxiety and skepticism.  Check out the article "5 Reasons Why Educators are Hesitant to Introduce Technology into the Classroom (and why they should anyway)" from digedu.com. The last of the five reasons addresses the fear of the unknown. Below is a short testimonial from Cindy Schmatz from North Elementary. She attended a short professional development session on iMovie in the morning and in the afternoon had students creating movie trailers.


    POWTOONS


    Below are two short videos on POWTOONS, a Google extension app. One is my own creation and the other is Heather Kociemba at the high school explaining a math concept. Another great tool to present content in a different way.


    Weekly blog intro: duck feathers and documentaries to Airserver and iMovie

    This week's blog entry is entitled "duck feathers and documentaries to Airserver and iMovie". I intentionally put duck feathers and documentaries in the front to illustrate that "it's not about the tool", it's what you want to accomplish. In this case a teacher at South Elementary wanted to simply display images of duck feathers from a magazine a student brought in and tie it back into the curriculum he was teaching. He used the Airserver tool to accomplish this. Another teacher wanted students to create a video about an historical figure using video and still images. To accomplish this, she used iMovie. In the blog entries below I have embedded those testimonials as well as simple tutorials on each of these tools. I hope you enjoy.


    Duck feathers and Airserver

    Have you ever wanted to show student work with your projector and still be completely mobile in the classroom? Then Airserver may be a useful tool for you. The Airserver software allows you to display your ipad through your projector. This can be very useful in demonstrating apps, working together on an app, showing youtube videos and being able to pause as you walk around the classroom (proximity classroom management), or displaying student work. The software itself actually allows you to project up to 5 ipads at one time, which could be useful in comparing student projects or building a group visual collage. Below is a short testimonial of a second grade teacher using Airserver to simply project images from a magazine a student had using the educreation app... a simple and effective means of showing content that the students identified. By using educreations, you could also annotate on the image itself. See the upcoming blog post on educreations :)Below that video is a short tutorial on how to access and use Airserver and how to set your computer and ipad for optimal use.

    ...
    Duck feathers and Airserver: a testimonial


    Airserver tutorial and optimal set-up


    Historical Figure Documentaries and iMovie

    People are what shape and define history. Within the Minnesota State Standards for Social Studies alone, the term "historical figure" is denoted seventeen different times and the word "people" over forty different times. With such an emphasis on people and history ,it is no wonder that students are consistently asked to create projects and write papers about significant historical figures. One way to meet multiple standards,engage students, and climb that elusive ladder of Bloom's Taxonomy is to offer students a means of creation. One tool (there are others) that can help achieve this is iMovie. iMovie is a powerful video editing software that can be used on a Mac, ipad, ipad mini, and iphone. Below is a short testimonial of how Shannon Ahrens, middle school computer applications teacher utilized iMovie to create a documentary of historical figures. Below that video is a short tutorial on how to make a simple movie. Enjoy :)

    iMovie in the middle school


    iMovie App tutorial


    "One Take videos" and blog Introduction

    Below is a short video introducing the Tiger Tech weekly blog postings entitled, "One Take Videos and Kahoot"; the topics of this week. As mentioned in the clip, recording a video in one take enables you to get content out to your audience very quickly without the hassle of editing. Most people, however, tend to get too concerned with editing and making the video look "professional". If your goal is to produce a professional video for the whole world to see, then, perhaps editing and enhancing the video is the way to go. But if your goal is to simply get a message out or explain a concept, then a short "raw" video can be just as effective. Instead of worrying about the video appearance, focus on strong content and a clear explanation ... and remember, it's okay to not be "perfect"! 


    Marzano Lesson Segments

         Learning anything new has, to some degree, a learning curve. The same is true of the Marzano Framework that we are learning and utilizing in our school district. As administrators, teachers, and staff acquire more training on the concepts and framework of Marzano, there will be more aha! moments, where we just "get it" and understand what is being presented. Below is an excellent video put together by high school principals Barb Muckenhirn and Darin Laabs explaining one of their aha! moments; the structure of Lesson Segments. 

    Marzano Definition: 
    The Marzano Observation and Feedback Protocol identifies the 41 key strategies revealed by research for effective teaching presented in a robust, easy to understand model of instruction based on the Art and Science of Teaching. All 41 Key Strategies are organized into 9 Design Questions, which are further organized into 3 Lesson Segments.

    Kahoot!

    Kahoot! is game-based classroom response system that motivates participation through game-based learning and rewards in a social setting ... essentially an interactive trivia game for students. Below are two short videos on Kahoots!: the first video explains the basic concept of Kahoot!, highlighting the benefits of assessment; the second video shows Kahoot! in action in Mr. Onstad's classroom at the middle school. The second video shows about a minute of interaction in the classroom and then an evaluation by the students. As you will see, a majority of students enjoyed the activity, with only a few negatives about the questions being timed and the student view not containing the answer selections. Overall, a very engaging and simple assessment.